Sunday, February 25, 2018

Running around the block: a dummy's first encounter with AWS Lambda

It all started when the Egyptians slid a few marbles on a wooden frame to ease up on their brains in simple arithmetic; or perhaps when the Greeks invented the Antikythera Mechanism to track the movement of planets to two-degrees-per-millennium accuracy. Either way, computing has come a long way by now: Charles Babbage's Analytical Engine, Alan Turing's Enigma-breaker, NASA's pocket calculator that took man to the moon, Deep Blue defeating Garry Kasparov the Chess Grandmaster, and so forth. In line with this, software application paradigms also have shifted dramatically: from nothing (pure hardware-based programming), monoliths, modularity, SOA, cloud, and now, serverless.

At this point in time, "serverless" generally means FaaS (functions-as-a-service); and FaaS literally means AWS Lambda, both from popularity and adoption points of view. Hence it is not an exaggeration to claim that the popularity of serverless development would be proportional to the ease of use of lambdas.

Well, lambda has been there since 2015, is already integrated into much of the AWS ecosystem, and is in production use at hundreds (if not thousands) of companies; so lambda should be pretty intuitive and easy to use, right?

Well, it seems not, at least in my case. And my "case" being one of the official AWS examples, I'm not quite convinced whether lambda is friendly enough for newbies to the picture.

For a start, I wanted to implement AWS's own thumbnail creation use case without following their own guide, to see how far I could get.

As a programmer, I naturally started with the Lambda management console. The code had already been written by generous AWS guys, so why reinvent the wheel? Copy, paste, save, run. Ta da!

Hmm, looks like I need to grow up a bit.

The "Create function" wizard was quite eye-catching, to be frank. With so many ready-made blueprints. Too bad it didn't already have the S3 thumbnail generation sample, or this story could have ended right here!

So I just went ahead with the "Author from scratch" option, with a nice name s3-thumbnail-generator.

Oh wait, what's this "Role" thing? It's required, too. Luckily it has a "Create new role from template(s)" option, which would save my day. (I didn't have any options under "Choose an existing role", and I'm too young to "Create a custom role".)

Take it easy. "Role name": s3-thumbnail-generator-role. But how about the "policy template"?

Perhaps I should find something S3-related, since my lambda is all-S3.

Surprise! The only thing I get when I search for S3, is "S3 object read-only permissions". Having no other option I just snatched it. Let's see how far I can get before I fall flat on my face!

Time to hit "Create function".

Create Function wizard

Wow, their lambda designer looks really cool!

AWS Lambda editor

"Congratulations! Your Lambda function "s3-thumbnail-generator" has been successfully created. You can now change its code and configuration. Click on the "Test" button to input a test event when you are ready to test your function."

Okay, time for my copy-paste mission. "Copy" on the sample source code, Ctrl+A and Ctrl+V on the lambda code editor. Simple!

All green (no reds). Good to know.

"Save", and "Test".

Create test event dialog

Oh, I should have known better. Yup, if I am going to "test", I need a "test input". Obviously.

I knew that testing my brand-new lambda would not be as easy as that, but I didn't quite expect having to put together a JSON-serialized event by hand. Thankfully the guys had done a great job here as well, providing a ready-made "S3 Put" event template. So what else would I select? :)

S3 Put test event

As expected, the first run was a failure:

{
  "errorMessage": "Cannot find module 'async'",
  "errorType": "Error",
  "stackTrace": [
    "Function.Module._load (module.js:417:25)",
    "Module.require (module.js:497:17)",
    "require (internal/module.js:20:19)",
    "Object. (/var/task/index.js:2:13)",
    "Module._compile (module.js:570:32)",
    "Object.Module._extensions..js (module.js:579:10)",
    "Module.load (module.js:487:32)",
    "tryModuleLoad (module.js:446:12)",
    "Function.Module._load (module.js:438:3)"
  ]
}

Damn, I should have noticed those require lines. And either way it's my bad, because the page where I copied the sample code had a big fat title "Create a Lambda Deployment Package", and clearly explained how to bundle the sample into a lambda-deployable zip.

So I created a local directory containing my code, and the package.json, and ran an npm install (good thing I had node and npm preinstalled!). Building, zipping and uploading the application was fairly easy, and hopefully I would not have to go through a zillion and one such cycles to get my lambda working.

(BTW, I wish I could do this in their built-in editor itself; too bad I could not figure out a way to add the dependencies.)

Anyway, time is ripe for my second test.

{
  "errorMessage": "Cannot find module '/var/task/index'",
  "errorType": "Error",
  "stackTrace": [
    "Function.Module._load (module.js:417:25)",
    "Module.require (module.js:497:17)",
    "require (internal/module.js:20:19)"
  ]
}

index? Where did that come from?

Wait... my bad, my bad.

'index.js not found' warning

Seems like the Handler parameter still holds the default value index.handler. In my case it should be CreateThumbnail.handler (filename.method).

Let's give it another try.

Success!?

Seriously? No way!

Ah, yes. The logs don't lie.

2018-02-04T17:00:37.060Z ea9f8010-09cc-11e8-b91c-53f9f669b596
 Unable to resize sourcebucket/HappyFace.jpg and upload to
 sourcebucketresized/resized-HappyFace.jpg due to an error: AccessDenied: Access Denied
END RequestId: ea9f8010-09cc-11e8-b91c-53f9f669b596

Fair enough; I don't have sourcebucket or sourcebucketresized, but probably someone else does. Hence the access denial. Makes sense.

So I created my own buckets, s3-thumb-input and s3-thumb-inputresized, edited my event input (thanks to the "Configure test event" drop-down) and tried again.

2018-02-04T17:06:26.698Z bbf940c2-09cd-11e8-b0c7-f750301eb569
 Unable to resize s3-thumb-input/HappyFace.jpg and upload to
 s3-thumb-inputresized/resized-HappyFace.jpg due to an error: AccessDenied: Access Denied

Access Denied? Again?

Luckily, based on the event input, I figured out that the 403 was actually indicating a 404 (not found) error, since my bucket did not really contain a HappyFace.jpg file.

Hold on, dear reader, while I rush to the S3 console and upload my happy face into my new bucket. Just a minute!

Okay, ready for the next test round.

2018-02-04T17:12:53.028Z a2420a1c-09ce-11e8-9506-d10b864e6462
 Unable to resize s3-thumb-input/HappyFace.jpg and upload to
 s3-thumb-inputresized/resized-HappyFace.jpg due to an error: AccessDenied: Access Denied

The exact same error? Again? Come on!

It didn't make sense to me; why on Earth would my own lambda running in my own AWS account, not have access to my own S3 bucket?

Wait, could this be related to that execution role thing; where I blindly assigned S3 read-only permissions?

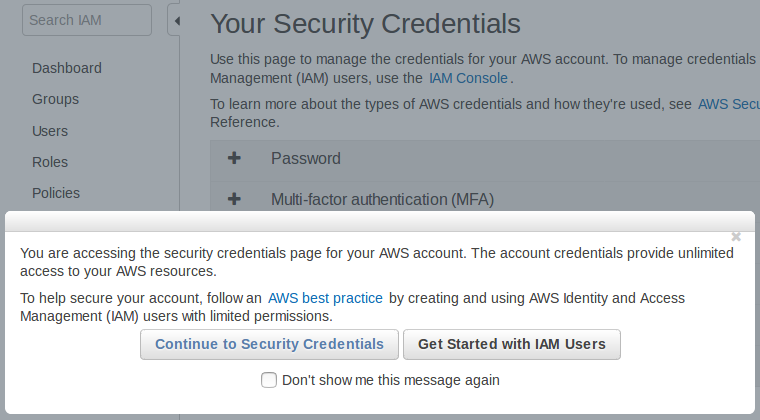
A bit of Googling led me to the extremely comprehensive AWS IAM docs for lambda, where I learned that the lambda executes under its own IAM role; and that I have to manually configure the role based on what AWS services I would be using. Worse still, in order to configure the role, I have to go all the way to the IAM management console (which—fortunately—is already linked from the execution role drop-down and—more importantly—opens in a new tab).

Custom role drop-down option

Fingers crossed, till the custom role page loads.

Custom role creation

Oh no... More JSON editing?

In the original guide, AWS guys seemed to have nailed the execution role part as well, but it was strange that there was no mention of S3 in there (except in the name). Did they miss something?

Okay, for the first time in history, I am going to create my own IAM role!

Bless those AWS engineers, a quick Googling revealed their policy generator jewel. Just the thing I need.

But getting rid of the JSON syntax solves only a little part of the problem; how can I know which permissions I need?

Google, buddy? Anything?

Ohh... Back into the AWS docs? Great...

Well, it wasn't that bad, thanks to the S3 permissions guide. Although it was somewhat overwhelming, I guessed what I needed was some permissions for "object operations", and luckily the doc had a nice table suggesting that I needed s3:GetObject and s3:PutObject (consistent with the s3.getObject(...) and s3.putObject(...) calls in the code).

AWS policy generator

After some thinking, I ended up with an "IAM Policy" with the above permissions, on my bucket (named with the tedious syntax arn:aws:s3:::s3-thumb-input):

{
  "Version": "2012-10-17",
  "Statement": [
    {
      "Sid": "Stmt1517766308321",
      "Action": [
        "s3:PutObject"
      ],
      "Effect": "Allow",
      "Resource": "arn:aws:s3:::s3-thumb-inputresized"
    },
    {
      "Sid": "Stmt1517766328849",
      "Action": [
        "s3:GetObject"
      ],
      "Effect": "Allow",
      "Resource": "arn:aws:s3:::s3-thumb-input"
    }
  ]
}

And pasted and saved it on the IAM role editor (which automatically took me back to the lambda console page; how nice!)

Try again:

Same error?!

Looking back at the S3 permissions doc, I noticed that the object permissions seem to involve an asterisk (/* suffix, probably indicating the files) under the resource name. So let's try that as well, with a new custom policy:

{
  "Version": "2012-10-17",
  "Statement": [
    {
      "Sid": "Stmt1517766308321",
      "Action": [
        "s3:PutObject"
      ],
      "Effect": "Allow",
      "Resource": "arn:aws:s3:::s3-thumb-inputresized/*"
    },
    {
      "Sid": "Stmt1517766328849",
      "Action": [
        "s3:GetObject"
      ],
      "Effect": "Allow",
      "Resource": "arn:aws:s3:::s3-thumb-input/*"
    }
  ]
}

Again (this is starting to feel like Whiplash):

2018-02-04T17:53:45.484Z 57ce3a71-09d4-11e8-a2c5-a30ce229e8b7
 Successfully resized s3-thumb-input/HappyFace.jpg and uploaded to
 s3-thumb-inputresized/resized-HappyFace.jpg

WOO-HOO!!!

And, believe it or not, a resized-HappyFace.jpg file had just appeared in my s3-thumb-inputresized bucket; Yeah!

Now, how can I configure my lambda to automatically run when I drop a file into my bucket?

Thankfully, the lambda console (with its intuitive "trigger-function-permissions" layout) made it crystal clear that what I wanted was an S3 trigger. So I added one, with "Object Created (All)" as the "Event Type" and "jpg" as the suffix, saved everything, and dropped a JPG file into my bucket right away.

Trigger added

Yup, works like a charm.

To see how long the whole process took (in actual execution, as opposed to the "tests"), I clicked the "logs" link on the (previous) execution result pane, and went into the newest "log stream" shown there; nothing!

And more suspiciously, the last log in the newest log stream was an "access denied" log, although I had gotten past that point and even achieved a successful resize. Maybe my latest change broke the logging ability of the lambda?

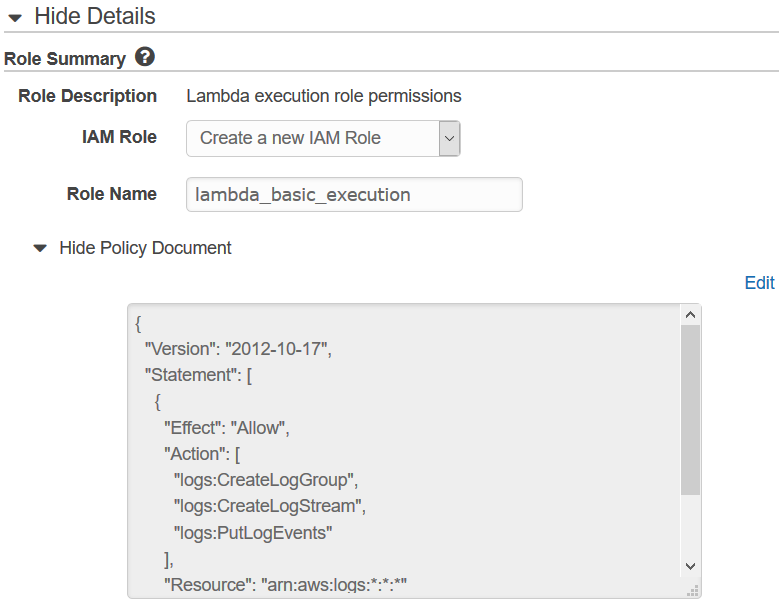
Thanks to Google and StackOverflow, I found that my execution role needs to contain some logging related permissions as well; indeed, now I remember there were some permissions in the permission editor text box when I started creating my custom role, and once again I was ignorant enough to paste my S3 policies right over them.

Another round of policy editing:

{
  "Version": "2012-10-17",
  "Statement": [
    {
      "Sid": "Stmt1517766308321",
      "Action": [
        "s3:PutObject"
      ],
      "Effect": "Allow",
      "Resource": "arn:aws:s3:::s3-thumb-inputresized/*"
    },
    {
      "Sid": "Stmt1517766328849",
      "Action": [
        "s3:GetObject"
      ],
      "Effect": "Allow",
      "Resource": "arn:aws:s3:::s3-thumb-input/*"
    },
    {
      "Action": [
        "logs:CreateLogGroup",
        "logs:CreateLogStream",
        "logs:PutLogEvents"
      ],
      "Effect": "Allow",
      "Resource": "arn:aws:logs:*:*:*"
    }
  ]
}

Another file drop, and this time both the resize and the logs worked flawlessly... Finally!

Now that everything is straightened out, and my thumbnail is waiting in my destination bucket, I fired up my browser, typed http://s3-thumb-inputresized.s3.amazonaws.com/resized-HappyFace.jpg (in accordance with the S3 virtual hosting docs), and hit Enter, expecting a nice thumbnail in return.

<Error>
  <Code>AccessDenied</Code>
  <Message>Access Denied</Message>
  <RequestId>C8BAC3D4EADFF577</RequestId>
  <HostId>PRnGbZ2olpLi2eJ5cYCy0Wqliqq5j1OHGYvj/HPmWqnBBWn5EMrfwSIrf2Y1LGfDT/7fgRjl5Io=</HostId>
</Error>

Already tired of that "AccessDenied" message!

Apparently, although my code generates the file, it does not make the file publicly accessible (but what good would a private thumbnail be, huh?)

Digging through the AWS docs, I soon discovered the ACL parameter of the putObject operation, which allows the S3 uploaded file to be public. Hoping this would solve all problems on the planet, I quickly upgraded my code to set the file's ACL to public-read:

            s3.putObject({
                    Bucket: dstBucket,
                    Key: dstKey,
                    Body: data,
                    ContentType: contentType,
                    ACL: 'public-read'
                },
                next);
            }

Saved the function, and hit Test:

2018-02-04T18:06:40.271Z 12e44f61-19fe-11e8-92e1-3f4fff4227fa
 Unable to resize s3-thumb-input/HappyFace.jpg and upload to
 s3-thumb-inputresized/resized-HappyFace.jpg due to an error: AccessDenied: Access Denied

Again?? Are you kidding me?!

Fortunately, this time I knew enough to go straight into the S3 permissions guide, which promptly revealed that I also needed to have the s3:PutObjectAcl permission in my policy, in order to use the ACL parameter in my putObject call. So another round trip to the policy editor, to the IAM dashboard, and back to the lambda console.

2018-02-04T18:15:09.670Z 1d8dd7b0-19ff-11e8-afc0-138b93af2c40
 Successfully resized s3-thumb-input/HappyFace.jpg and uploaded to
 s3-thumb-inputresized/resized-HappyFace.jpg

And this time, to my great satisfaction, the browser happily showed me my happy face thumbnail when I fed the hosting URL http://s3-thumb-inputresized.s3.amazonaws.com/resized-HappyFace.jpg into it.

All in all, I'm satisfied that I was finally able to solve the puzzle on my own, by putting all the scattered pieces together. But I cannot help imagining how cool it would have been if I could build my lambda in freestyle, with AWS taking care of the roles, permissions and whatnot, on its own, without getting me to run around the block.

Maybe I should have followed that official guide, right from the start... but, then again, naaah :)

Tuesday, February 20, 2018

Serverless Revolution: the Good, the Bad and the Ugly

"It's stupidity. It's worse than stupidity: it's a marketing hype campaign."
Richard Stallman commenting on cloud computing, Sep 2008

And, after 10 years, you are beginning to think twice when someone mentions the word: is it that thing in the sky, or that other thing that is expected to host 83% of the world's enterprise workloads by 2020?

Another revolution is underway, whether you like it or not. AWS is on the lead, with MS Azure and GCP following closely behind, all cherishing a common goal:

Untethering software from infra.

Serverless.

FaaS.

Death of DevOps.

You name it.

Regardless of the name (for the sake of convenience, we shall call the beast "serverless"), this new paradigm is already doing its part in reshaping the software landscape. We already see giants like Coca-Cola adopting serverless components into their production stacks, and frameworks like Serverless gaining funding in the millions. Nevertheless, we should keep in mind that serverless is not for everyone, everywhere, everytime—at least not so far.

Server(less) = State(less)

As a conventional programmer, the biggest "barrier" I see when it comes to serverless, is the "statelessness". Whereas earlier I could be fairly certain that the complex calculation result that I stored in memory; or the fairly large metadata file I extracted into /tmp; or the helper subprocess that I just spawned; would be still there once my program is back in control, serverless shatters pretty much all of those assumptions. Although implementations like lambda tend to retain state for a while, the general contract is that your application should be able to abandon all hope and gracefully start from zero in case it was invoked with a clean slate. No longer are there in-memory states: if you wanna save, you save. You don't, you lose.

Thinking from another angle, this might also be considered one of the (unintended) great strengths of serverless; because transient state (whose mere existence is made possible by "serverful" architecture) is the root of most—if not all—evil. Now you have, by design, less room for making mistakes—which could be a fair trade-off, especially for notorious programmers like myself, seeking (often premature) optimization via in-memory state management.

Nevertheless, we should not forget the performance impairments caused by the diminishing of in-memory state management and caching capacity; your state manager (data store), which was formerly a few "circuit hops" away, would now be several network hops away, leading to several milliseconds—perhaps even seconds—of latency, along with more room for failures as well.

Sub-second billing

If you had been alive in the last decade, you would have seen it coming: everything gradually moving into the pay-as-you-go model. Now it has gone to such lengths that lambdas are charged at 0.1-second execution intervals—and the quantization will continue. While this may not mean much advantage—and sometimes may even mean disadvantage—for persistent loads, applications with high load variance could gain immense advantage from not having to provision and pay for their expected peak load all the time. Not to mention event-driven and batch-processor systems with sparse load profiles which may enjoy savings at an order of magnitude, especially when they are small-scale and geographically localized.

Additionally, the new pay-per-resource-usage model (given that time—or execution time, to be specific—is also a highly-valued resource) encourages performance-oriented programming, which is a good sign indeed. FaaS providers usually use composite billing metrics, combining execution time with memory allocation etc., further strengthening the incentive for balanced optimization, ultimately yielding better resource utilization, less wastage and the resulting financial and environmental benefits.

Invisible infra

In the place of physical hardware, virtualized (later) or containerized (still later) OS environments, now you only get to see a single process: effectively a single function or unit of work. While this may sound great at first (no more infra/hardware/OS/support utility monitoring or maintenance—hoping the serverless provider would take care of them for us!), it also means a huge setback in terms of flexibility: even in the days of containers we at least had the flexibility to choose the base OS of our liking (despite still being bound to the underlying kernel), whereas all we now have is the choice of the programming language (and its version, sometimes). However, those who have experienced the headaches of devops would certainly agree that the latter is a very justifiable trade-off.

Stronger isolation

Since you no longer have access to the real world (you would generally be a short-lived containerized process), there is less room for mistakes (inevitable, because there's actually less that you can do!). Even if you are compromised, your short life and limited privileges can prevent further contamination, unless the exploit is strong enough to affect the underlying orchestration framework. It follows that, unfortunately, if such a vulnerability is ever discovered, it could be exploited big-time because a lambda-based malware host would be more scalable than ever.

Most providers deliberately restrict lambdas from attempting malicious activities, such as sending spam email, which would be frowned upon by legitimate users but praised by the spam-haunted (imagine a monthly spike of millions of lambda runtimes—AWS already offers one million free invocations and 3.2 million seconds of execution time— sending spam emails to a set of users; a dozen free AWS subscriptions would give an attacker a substantial edge!)

Vendor locking: a side effect?

This is an inherent concern with every cloud platform—or, if you think carefully—any platform, utility or service. The moment you decide to leverage a "cool" or "advanced" feature of the platform, you are effectively coupled to it. This is true, more than ever, for serverless platforms: except for the language constructs, pretty much everything else is provider-specific, and attempting to write a "universal" function would end up in either an indecipherably complex pile of hacks and reinvented wheels, or, most probably, nothing.

In a sense, this is an essential and inevitable pay-off; if you have to be special, you have to be specific! Frameworks like Serverless are actively trying to resolve this, but as per the general opinion a versatile solution is still far-fetched.

With great power comes great responsibility

Given their simplicity, versatility and scalability, serverless applications can be a valuable asset for a company's IT infra; however, if not designed, deployed, managed and monitored properly, things can get out of hand very easily, both in terms of architectural complexity and financial concerns. So, knowing how to tame the beast is way more important than simply learning what the beast can do.

Besr of luck with your serverless adventures!

Serverless: Getting started with SLAppForge Sigma

Yo! C'mere.

Lookn' for somethn'?

Serverless, ya?

Up there. Go strait, 'n take a right at da "Sigma" sign.

(Well, don't blame us yet; at least we thought it was that easy!)

One of our dream goals was that working with Sigma should be a no-brainer, even for a complete stranger to AWS. However, in the (very likely) event that it is not so yet, here is a short guide on how you can get the wheels turning.

Ingredients

First off, you need:

  • an internet connection; since you are reading this, that's probably already ticked off!
  • an AWS account; you could either create your own free account or ping us via Slack for one of our demo accounts
  • a GitHub account; again, free to sign up if you don't have one already!
  • a "modern" browser; we have tested ourselves on Chrome 59+, Firefox 58+, Edge 41+ and Safari 10.1.2+; other versions would probably work as well :)
  • a mouse, trackball or touchpad (you'll drag quite a bit of stuff around) and a keyboard (you'll also type some stuff)

AWS Credentials

Before firing up Sigma, you need to gather or create some access credentials for allowing Sigma to access your AWS account. Sigma will do a lot on your behalf, including building and deploying your app into your AWS account, so for the moment we need full admin access to your account (we are planning on preparing a minimal set of permissions, so you can sleep well at night).

For obtaining admin credentials for your AWS account:

The easy (but not recommended) way:

Here you will allow Sigma to act as your AWS root user for gaining the required access. Although Sigma promises that it will never share your credentials with other parties (and store them, only if you ask to do so, with full encryption), using root user credentials is generally against the AWS IAM best practices.

  1. Open the Security Credentials page of the IAM dashboard. If AWS asks for your confirmation, click Continue to Security Credentials to proceed.

    AWS IAM: Security Credentials page

  2. Click Access keys (access key ID and secret access key) among the list of accordions on the right pane.

    Root access keys

  3. Click the Create New Access Key button. A pop-up will appear, stating that your access key has been created successfully.
  4. Click Show Access Key, which will display a pane with two parameters: an Access Key ID that looks like AKIAUPPERCASEGIBBERISH and a longer, Secret Access Key. (WARNING: You'll see the latter value only once!)

    Root keypair created

  5. Copy both of the above values to a secure location (or click Download Key File to save them to your filesystem). Combined, they can do anything against anything in your AWS account: the two keys to rule them all.

The detailed version is here.

The somewhat harder (but safer) way:

Here you will create a new administrator group inside your AWS account, create and assign a new user to that group (so that the user would have admin privileges on your account), and feed that user's access credentials to Sigma. This way, you can instantly revoke Sigma's access anytime by disabling/deleting the access keys of the new user, should you ever come to distrust/hate Sigma at some point in time (but don't do that to us, please! :))

  1. Go to the IAM dashboard.
  2. Select Users on the left pane.
  3. Click the Add user button at the top of the right pane.

    AWS IAM: Add User

  4. Type a name (e.g. sigma) for the User name field.
  5. Under Access type, tick Programmatic access, and click Next: Permissions at the bottom right. (Tip: you can get to this point right away, using this shortcut URL.

    User groups and permissions

  6. Click Create group under the Add user to group option. A new pop-up will open.
  7. Type a name (e.g. admin) for the Group name field.
  8. Tick off AdministratorAccess in the list of policies. (It should usually appear at the top of the list; if not, type Administrator in the Filter text box to see it.)

    Create group

  9. Click Create group.
  10. The pop-up will close, and the brand new group will appear in the groups list of the permissions page, already selected (ticked off) for you.
  11. Click Next: Review.
  12. Double-check that your user has a nice name, and that it belongs to the new group you just created. If all looks fine, click Create user.

    Review new user

  13. Once the user is created, you will be shown a Success page with a table containing the Access Key ID and Secret Access Key (masked with * s) of the user.
  14. Click Show against the secret access key, to view its value. (WARNING: You'll see the latter value only once!)

    Key pair of new user

  15. Copy both Access key ID and Secret access key to a safe location (or click Download CSV above).

Here's the official, detailed version.

Once you follow either of the above methods (and have an access key-secret key pair in hand), that's it! You'd no longer need to wander around on the AWS dashboards, as Sigma will handle it all for you.

Signing up with Sigma

Now, you're just three steps away from the awesome Sigma IDE! Let's go one step further by creating a brand new Sigma account (if you don't already have one):

  1. Go to the Sigma sign-in page.
  2. Click the "Create an account" link against the "New to Sigma?" message.
  3. Fill in your first and last names, email, and phone number (if it's okay with you).
  4. Take note of your username: we'll automatically generate one, using your first and last names. If you don't like our taste, you can always type in your own crazy one (as long as another user has not used it already).
  5. Choose a password. We are a bit peculiar about our passwords, so they need to be at least 8 letters long and have at least one from each of the letter categories: uppercase, lowercase, numeric and symbolic (@, $, # etc.). You can press and hold the "show password" button (eye icon) to confirm what you have typed.
  6. When all looks good, click Sign Up.
  7. If we are happy with the info you provided, we'll take you to a confirmation page (Insert Confirmation Code). We'll also send an email to the address you indicated (from noreply@slappforge.com), with a verification code.
  8. Check your mailbox for our email (including promotions, spam, trash etc. in case it does not show up in the inbox). Once you find it, copy the 6-digit confirmation code in the email, paste it into the confirmation page, and click Confirm.
  9. If all goes well, we'll show you a "Confirmation successful!" message, with a link back to the sign-in page.
  10. Go to the sign-in page, and log in using your username (that you took note previously, on the signup page) and password.

Powering up Sigma

Way to go! Just two more steps!

  1. After sign-in, you'll be in an AWS Credentials page.
  2. Now, dig up the "access key ID" and "secret access key" that you retrieved from the AWS console previously, and paste them in the Access Key ID and Secret Key fields, respectively.
  3. Now, you have a decision to make:
    1. Sigma can store these AWS keys on your behalf, so that you will not have to re-enter them at every log-in. We will encrypt the keys with your own password (your password will be in Cognito, AWS's own user management service, so we will never see your password either!), hence rest assured that we, or any other party, will not—and will not be able to—steal your keys :)
    2. If you are a bit too skeptical, you can avoid the storing option by unticking the Save Credentials tick box.
  4. When done, Click Load Editor.

Connecting GitHub

Yay! Last step!

  1. Now you will be in the projects page, with a quickstart pane (saying Integrate Sigma with GitHub!) on the left.

    Sigma Projects page with GitHub integration message

  2. Click the Sign in with GitHub button. A GitHub authorization window will pop up (if it does not, tune your browser to enable pop-ups for sigma.slappforge.com and try again).
  3. On the pop-up, sign in to GitHub if you are not already signed in.
  4. The pop-up asks you to authorize the Sigma GitHub app (made by us, slappforge) to connect with yOnour GitHub account. Click the Authorize slappforge button to continue.
  5. Once done, the pop-up will close, and the quickstart pane will start displaying a bunch of ready-made Sigma projects!
    1. Your Projects tab will display any Sigma-compatible projects that are already in your GitHub account.
    2. Samples tab will display the numerous samples published by SLAppForge, that you can try out right away.

      Sigma sample projects

    3. If you have the GitHub URL of any other Sigma project that you know of, just paste it in the search bar of the Public Repositories tab and hit the search button.
  6. Once you have the project that you were looking for, simply click to load it!

Voilà!

Here comes the Sigma editor, loaded with the project you picked, and ready for action!

Friday, February 16, 2018

Sigma: The New Kid on the Serverless Block

Despite its young age (barely 73 years; in comparison to, say, automobiles (200+), digital computing is growing and flourishing rapidly; and so are the associated tools and utilities. Today's "hot" topic or tech is no longer hot tomorrow, "legacy" in a week and "deprecated" in a month.

Application deployment and orchestration is no exception: in just three decades we have gone from legacy monoliths to modular systems, P2P integration, middleware, SOA, microservices, and the latest, functions or FaaS. The deployment paradigm has shifted to comply, with in-house servers and data centers, enterprise networks, VMs, containers, and now, "serverless".

Keeping up with things was easy so far, but the serverless paradigm demands quite a shift in the developer mindset (not to mention the programming paradigm). This, combined with the lack of intuitive tooling, has fairly hindered the adoption of serverless application development, even among the cutting-edge developers.

And (you guessed it), that's where _____ comes into play.

Missing something?

Yup.

A way to glue stuff together.

A way to compose a serverless application care-free. Without having to worry—and to read tons of documentation, watch reels of tutorials, or trial-and-error till your head is on fire—about all the bells and whistles of the underlying framework and related services.

Essentially, a sum-up of all that is serverless.

Sum.

Sigma.

Σ.

Sigma Logo

What's in a name?

As the name implies, (quoted from the official website)

The Sigma editor is a hybrid between the simplicity of drag-and-drop style development,
and the full and unlimited power of raw code.

The drag-and-drop events generate sample or usage snippets to quickly get started,
and introduce a powerful, uniform and intuitive library with auto-completion,
which allow users to quickly become productive in developing Serverless applications
that integrate with a myriad of AWS based services.

Making of...

Before Sigma, a bit of background of its origins.

As a first-time user of AWS Lambda, one of our team members brought up an impressive series of questions: if serverless is so cool, why is it so complicated to get an application up and running in Lambda?

(His quest, converted into a presentation, is [right here].)

And we ourselves started trying out the same thing. Guess what, we got the same questions as well.

So we set out to devise something that could bypass all those tedious steps: something where we could just write our code, save it, and deploy it as a working serverless application, without having to wander from dashboard to dashboard, or sift through heaps of documentation or reels of video tutorials.

And we ended up with Sigma!

Yet another IDE?

At first glance, Sigma looks like another cloud IDE that additionally supports deploying an application directly into a serverless provider environment (AWS so far).

However, there are a few not-to-be-missed distinctions:

  • Unlike many of the existing cloud IDEs, Sigma itself is truly serverless; it runs completely inside your browser, using backend services only for user authentication and analytics, and requires no dedicated server/VM/container to be running in the background. Just fire up your browser, log in, and start coding your dream away.
  • Sigma directly interacts with and configures the serverless platform on your behalf, using the credentials that you provide, saving hours of configuration and troubleshooting time. No more back-and-forth between overcomplicated dashboards and dizzying configurations.
  • Sigma encapsulates the complexities of the serverless platform, such as service entities, access policies, invocation trigger configurations and associated permissions, and even some API invocation syntaxes, saving you the trouble of having to delve into piles of documentation.
  • All of this comes in a fairly simple, intuitive environment, with easy, drag-and-drop composition combined with the full power of written code. Drag and drop a DynamoDB table into the UI, pick your operation and just write your logic, and Sigma will do the magic of automatically creating, configuring and managing the DynamoDB table on your AWS account.

Now, I won't say that's "just another IDE"; what say you?

A serverless platform?

Based on the extent of its capabilities, you may also be inclined to classify Sigma as a serverless platform. This is true to a great extent; after all, Sigma facilitates all of it—composing, building and deploying the application! However...

Hybrid! It's a hybrid!

Yup, Sigma is a hybrid.

Fusion of a cloud IDE (which in itself is a hybrid of graphical composition and granular coding) and a serverless development framework (which automatically deploys and manages the resources, permissions, wiring and other bells and whistles of your serverless application).

One of a kind.

To be precise, the first of its kind.

A new beginning

With Sigma, we hope to redefine serverless development.

Yup. Seriously.

From here onwards, developers shall simply focus on what they need to achieve: workflow, business logic, algorithm, whatever.

Not about all the gears and crankshafts of the platform on which they would deploy the whole thing.

Not about the syntax of, or permissions required by, platform-specific API or service calls.

Not about the deployment, configurations and lifecycle of all the tables, buckets, streams, schedulers, REST endpoints, queues and so forth, that they want to use within their application.

Because Sigma will take care of it all.

And we believe our initiative would

  • make it easy for newcomers to get started with serverless development,
  • improve the productivity of devs that are already familiar with—or even experts of—serverless development,
  • speed up the adoption of serverless development among the not-yet-serverless community,
  • allow y'all to "think serverless", and
  • make serverless way much fun!

We have proof!

While developing Sigma, we also wanted to verify that we were doing the right thing, and doing it right. So we bestowed upon two of our fellows, the responsibility to develop two showcase applications using Sigma: a serverless accounting webapp, and a location-based mobile dating app.

To our great joy, both experiments were successful!

The accounting app SLAppBook is now live for public access. By default it runs against one of our test serverless backends, but you can always deploy the serverless backend project on your own AWS account via Sigma and point the frontend to your brand new backend, after which you can use it for your own personal use!

The dating app HotSpaces is currently undergoing some rad improvements (see, now it's the frontend that takes time to develop!) and will be out pretty soon!

So, once again, we have proof that Sigma really rocks it!

Far from perfection, but getting there; fast!

Needless to say, Sigma is pretty much an infant. It needs quite a lot more—more built-in services, better code suggestions, smarter resource handling, faster builds and deployments, support for other cloud platforms, you name it—before it can be considered "mature".

But we are getting there. And we will get there. Fast.

We will publish our roadmap pretty soon, which would include (among other things) adding more AWS services, supporting integration with external APIs/services and, most importantly, expanding to other cloud providers like GCP and MS Azure.

That's where we need your help.

We need you!

Needless to say, you are most welcome to try out Sigma. Sign up here, if you haven't already, and start playing around with our samples (once you are signed in to Sigma, you can directly open them via the projects page). Or, if you feel adventurous, start off with a clean slate, and start building your own serverless application.

We are continually smoothening the ride, but you may hit a few bumps here and there. Possibly even hard ones. Sometimes even impassable. Maybe none, if you are really lucky.

Either way, we are eagerly waiting for your feedback. Just write us about anything that came to your mind: a missing functionality, a popular AWS service that you really missed in Sigma (there are hundreds, no doubt!), the next cloud platform you would like Sigma to support; a failed build, a faulty deployment, a nasty error that hogged your browser; or even the slightest of improvements that you would like to see, like a misaligned button, a hard-to-scroll pop-up or a badly-named text label.

You can either use our official feedback form or the "Report an Issue" option on the IDE Help menu, post your feedback in our GitHub issue tracker, or send us a direct email at info@slappforge.com.

If you would like to join hands with us in our forward march, towards a "think serverless" future, drop us an email at info@slappforge.com right away.

Welcome to Sigma!

That's it; time to start your journey with Sigma!

(Originally authored on Medium.)

Inside a Lambda Runtime: A Peek into the Serverless Lair

Ever wondered what it is like inside a lambda? Stop wondering. Let's find out.

Ever since they surfaced in 2014, AWS's lambda functions have made themselves a steaming hot topic, opening up whole new annals in serverless computing. The stateless, zero-maintenance, pay-per-execution goodies are literally changing—if not uprooting— the very roots of the cloud computing paradigm. While other players like Google and MS Azure are entering the game, AWS is the clear winner so far.

Okay, preaching aside, what does it really look like inside a lambda function?

As per AWS folks, lambdas are driven by container technology; to be precise, AWS EC2 Container Service (ECS). Hence, at this point, a lambda is merely a Docker container with limited access from outside. However, the function code that we run inside the container has almost unlimited access to it—except root privileges— including the filesystem, built-in and installed commands and CLI tools, system metadata and stats, logs, and more. Not very useful for a regular lambda author, but could be so if you intend to go knee-deep in OS-level stuff.

Obviously, the easiest way to explore all these OS-level offerings is to have CLI (shell) access to the lambda environment. Unfortunately this is not possible at the moment; nevertheless, combining the insanely simple syntax provided by the NodeJS runtime and the fact that lambdas have a few minutes' keep-alive time, we can easily write a ten-liner lambda that can emulate a shell. Although a real "session" cannot be established in this manner (for example, you cannot run top for a real-time updating view), you can repeatedly run a series of commands as if you are interacting with a user console.

let {exec} = require('child_process');

exports.handle = (event, context, callback) => {
  console.log(event);
  exec(event.cmd, (err, stdout, stderr) => {
    console.log(stdout);
    if (err) console.log(stderr);
    callback(undefined, {statusCode: 200});
  });
}

Lucky for us, since the code is a mere ten-liner with zero external dependencies, we can deploy the whole lambda—including code, configurations and execution role—via a single CloudFormation template:

AWSTemplateFormatVersion: '2010-09-09'
Resources:
  shell:
    Type: AWS::Lambda::Function
    Properties:
      FunctionName: shell
      Handler: index.handle
      Runtime: nodejs6.10
      Code:
        ZipFile: >
          let {exec} = require('child_process');

          exports.handle = (event, context, callback) => {
            console.log(event);
            exec(event.cmd, (err, stdout, stderr) => {
              console.log(stdout);
              if (err) console.log(stderr);
              callback(undefined, {statusCode: 200});
            });
          }
      Timeout: 60
      Role:
        Fn::GetAtt:
        - role
        - Arn
  role:
    Type: AWS::IAM::Role
    Properties:
      ManagedPolicyArns:
      - arn:aws:iam::aws:policy/service-role/AWSLambdaBasicExecutionRole
      AssumeRolePolicyDocument:
        Version: 2012-10-17
        Statement:
        - Action: sts:AssumeRole
          Effect: Allow
          Principal:
            Service: lambda.amazonaws.com

Deploying the whole thing is as easy as:

aws cloudformation deploy --stack-name shell --template-file /path/to/template.yaml --capabilities CAPABILITY_IAM

or selecting and uploading the template to the CloudFormation dashboard, in case you don't have the AWS CLI to do it the (above) nerdy way.

Once deployed, it's simply a matter of invoking the lambda with a payload containing the desired shell command:

{"cmd":"the command to be executed"}

If you have the AWS CLI, the whole thing becomes way more sexy, when invoked via the following shell snippet:

echo -n "> "
read cmd
while [ "$cmd" != "exit" ]; do
  echo
  aws lambda invoke --function-name shell --payload "{\"cmd\":\"$cmd\"}" --log-type Tail /tmp/shell.log --query LogResult --output text | base64 -d
  echo
  echo -n "> "
  read cmd
done

With this script in place, all you have is to invoke the script; you will be given a fake "shell" where you can execute your long-awaited command, and the lambda will execute it and return the output back to your console right away, dropping you back into the "shell" prompt:

> free

START RequestId: c143847d-12b8-11e8-bae7-1d25ba5302bd Version: $LATEST
2018-02-16T01:28:56.051Z c143847d-12b8-11e8-bae7-1d25ba5302bd { cmd: 'free' }
2018-02-16T01:28:56.057Z c143847d-12b8-11e8-bae7-1d25ba5302bd              total       used       free     shared    buffers     cached
Mem:       3855608     554604    3301004        200      44864     263008
-/+ buffers/cache:     246732    3608876
Swap:            0          0          0

END RequestId: c143847d-12b8-11e8-bae7-1d25ba5302bd
REPORT RequestId: c143847d-12b8-11e8-bae7-1d25ba5302bd Duration: 6.91 ms Billed Duration: 100 ms  Memory Size: 128 MB Max Memory Used: 82 MB

>

With this contraption you could learn quite a bit about the habitat and lifestyle of your lambda function. I, for starters, came to know that the container runtime environment comprises Amazon Linux instances, with around 4GB of (possibly shared) memoey and several (unusable) disk mounts of considerable size (in addition to the "recommended-for-use" 500MB mount on /tmp):

> df

START RequestId: bb0034fa-12ba-11e8-8390-cb81e1cfae92 Version: $LATEST
2018-02-16T01:43:04.559Z bb0034fa-12ba-11e8-8390-cb81e1cfae92 { cmd: 'df' }
2018-02-16T01:43:04.778Z bb0034fa-12ba-11e8-8390-cb81e1cfae92 Filesystem     1K-blocks    Used Available Use% Mounted on
/dev/xvda1      30830568 3228824  27501496  11% /
/dev/loop8        538424     440    526148   1% /tmp
/dev/loop9           128     128         0 100% /var/task

END RequestId: bb0034fa-12ba-11e8-8390-cb81e1cfae92
REPORT RequestId: bb0034fa-12ba-11e8-8390-cb81e1cfae92 Duration: 235.44 ms Billed Duration: 300 ms  Memory Size: 128 MB Max Memory Used: 22 MB

> cat /etc/*-release

START RequestId: 6112efb9-12bd-11e8-9d14-d5c0177bc74f Version: $LATEST
2018-02-16T02:02:02.190Z 6112efb9-12bd-11e8-9d14-d5c0177bc74f { cmd: 'cat /etc/*-release' }
2018-02-16T02:02:02.400Z 6112efb9-12bd-11e8-9d14-d5c0177bc74f NAME="Amazon Linux AMI"
VERSION="2017.03"
ID="amzn"
ID_LIKE="rhel fedora"
VERSION_ID="2017.03"
PRETTY_NAME="Amazon Linux AMI 2017.03"
ANSI_COLOR="0;33"
CPE_NAME="cpe:/o:amazon:linux:2017.03:ga"
HOME_URL="http://aws.amazon.com/amazon-linux-ami/"
Amazon Linux AMI release 2017.03

END RequestId: 6112efb9-12bd-11e8-9d14-d5c0177bc74f
REPORT RequestId: 6112efb9-12bd-11e8-9d14-d5c0177bc74f Duration: 209.82 ms Billed Duration: 300 ms  Memory Size: 128 MB Max Memory Used: 22 MB

>

True, the output format (which is mostly raw from CloudWatch Logs) could be significantly improved, in addition to dozens of other possible enhancemenrs. So let's discuss, under comments!