Showing posts with label best serverless IDE. Show all posts

Friday, April 20, 2018

Sigma the Serverless IDE: resources, triggers, and heck, operations

With serverless, you stopped caring about the server.

With Sigma, you stopped (or will stop, if not already) about the platform.

Now all you care about is your code - the bliss of every programmer.

Or is it?

I hold her (the code) in my arms.

If you have done time with serverless frameworks, you would already know how they take away your platform-phobia, abstracting out the platform-specific bits of your serverless app.

And if you have already tried out Sigma, you would have noticed how it takes things further, relieving you of the burden of the configuration and deployment aspects as well.

Sigma for a healthier dev life!

Leaving behind just the code.

Just the beautiful, raw code.

So, what's the catch?

Okay. Now for the untold, unspoken, not-so-popular part.

You see, my friend, every good thing comes at a price.

Lucky for you, with Sigma, the price is very affordable.

Just a matter of sticking to a few ground rules while you develop your app. That's all.

Resources, resources.

All of Sigma's voodoo depends on one key thing: resources.
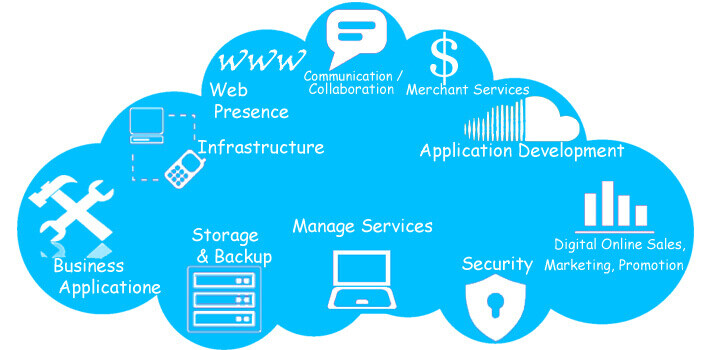
Resources, resources!

The concept is quite simple: every piece of your serverless app - may it be a DynamoDB table, S3 bucket or SNS topic - is a resource from Sigma's point of view.

If you remember the Sigma UI, the Resources pane on the left contains different resource types that you can have in your serverless app. (True, it's pretty short; but we're working on it :))

Resources pane in Sigma UI

Behind the scenes

When you drag a resource from this pane, into your code, Sigma secretly creates a resource (which it would later deploy into your serverless provider) to track the configurations of the actual service entity (say, the S3 bucket that should exist in AWS by the time your function is running) and all its usages within your code. The tracking is fully automated; frankly, you didn't even want to know about that.

Sigma tracks resources in your app, and deploys them into the underlying platform!

"New" or "existing"?

On almost all of Sigma's resource configuration pop-ups, you may have noticed two options: "new" vs "existing". "New" resources are the ones that would be (or have already been) created as a result of your project, whereas "existing" ones are those which have been created outside of your project.

Now that's a tad bit strange because we would usually use "existing" to denote things that "exist", regardless of their origin - even if they came from Mars.

Better brace yourself, because this also gives rise to a weirder notion: once you have deployed your project, the created resources (which now "exist" in your account) are still treated by Sigma as "new" resources!

And, as if that wasn't enough, this makes the resources lists in Sigma behave in totally unexpected ways; after you define a "new" resource, whenever you want to reuse that resource somewhere else, you would have to look for it under the "existing" tab of the resource pop-up; but it will be marked with a " (new)" prefix because, although it is already defined, it remains "new" from Sigma's point of view.

Now, how sick is that?!

Bang head here.

Perhaps we should have called them "Sigma" resources; or perhaps even better, "project" resources; while we scratch our heads, feel free to chip in and help us with a better name!

Rule o' thumb

Until this awkwardness is settled, the easiest way to get through this mess is to stick to this rule of thumb:


If you added a resource to your current Sigma project, Sigma would treat it as a "new" resource till the end of eternity.


Bottom line: no worries!

Being able to use existing resources is sometimes cool, but it means that your project would be much less portable. Sigma will always assume that the resources referenced by your project are already in existence, regardless of whatever AWS account you attempt to deploy it. At least until (if) we (ever) come up with a different resource management mechanism.


If you want portability, always stick to new resources. That way, even if a complete stranger gets hold of your project and deploys it in his own, alien, unheard-of AWS account, the project would still work.

If you are integrating with an already existing set of resources (e.g. the set of S3 bucket in your already-running dev/test/prod environment), using existing resources is the obvious (and the most convenient) choice.


Anyways, back to our discussion:

Where were we?

Ah, yes. Resources.

The secret life of resources

In a serverless app, you basically use resources for two things:

  • for triggering the app (as an event source, a.k.a. trigger)
  • for performing work inside the app, such as invoking external services

triggers and operations

Resources? Triggers?? Operations???

Sigma also associates its resources with your serverless app in a similar fashion:

In Sigma, a function can have several triggers (as long as the application itself is aware of tackling different trigger event types!), and can contain several operations (obviously).

Yet, they're different.

It is noteworthy that a resource itself is not a trigger or an operation; triggers and operations are associated with resources (they kind of "bridge" functions and resources) but a resource has its own independent life. As a result, a resource can power many triggers (to be precise, zero or more) and get involved in many operations, across many (again, zero or more) functions.

A good example is S3. If you want to write an image resizer function that would pick and process images dropped into a S3 bucket, you would configure a S3 trigger to invoke the function upon the file drop, and a S3 GetObject operation to retrieve and process the file; however, both will point to the same S3 resource, namely the bucket where images are being dropped into and fetched from.

Launch time!

At deployment, Sigma will take care of putting the pieces together - trigger configs, runtime permissions and whatnot - based on which function is associated with which resources, and in which ways (trigger-mode vs operation-mode). You can simply drag, drop and configure your buckets, queues and stuff, write your code, and totally forget about the rest!

That's the beauty of Sigma.

When a resource is "abandoned" (meaning that it is not used in any trigger or operation), it shows up in the "unused resources" list (remember the dustbin button on the toolbar?) and can be removed from the project; remember that if you do this, provided that the resource is a "new" one (rule of thumb: one created in Sigma), it will be automatically removed from your serverless provider account (for example, AWS) during your next deployment!

So there!

if Sigma's resource model (the whole purpose of this article) looks like a total mess-up to you, feel free to raise your voice on StackOverflow - or better still, our GitHub space, FB page or Twitter feed; we would appreciate it very much!

Of course, Sigma has nothing to hide; if you check your AWS account after a few Sigma deployments, you would realize the things we have been doing under the hood.

All of it, to make your serverless journey as smooth as possible.

And easy.

And fun. :)

Welcome to the world of Sigma!

Thursday, April 19, 2018

Sigma QuickBuild: Towards a Faster Serverless IDE

TL;DR

The QuickBuild/QuickDeploy feature described here is pretty much obsoleted by the test framework (ingeniously hacked together by @CWidanage), that gives you a much more streamlined dev-test experience with much better response time!


In case you hadn't noticed, we have recently been chanting about a new Serverless IDE, the mighty SLAppForge Sigma.

With Sigma, developing a serverless app becomes as easy as drag-drop, code, and one-click-Deploy; no getting lost among overcomplicated dashboards, no eternal struggles with service entities and their permissions, no sailing through oceans of docs and tutorials - above all that, nothing to install (just a web browser - which you already have!).

So, how does Sigma do it all?

In case you already tried Sigma and dug a bit deeper than just deploying an app, you may have noticed that it uses AWS CodeBuild under the hood for the build phase. While CodeBuild gives us a fairly simple and convenient way of configuring and running builds, it has its own set of perks:

  • CodeBuild takes a significant time to complete (sometimes close to a minute). This may not be a problem if you just deploy a few sample apps, but it can severely impair your productivity - especially when you begin developing your own solution, and need to reflect your code updates every time you make a change.
  • The AWS Free Tier only includes 100 minutes of CodeBuild time per month. While this sounds like a generous amount, it can expire much faster than you think - especially when developing your own app, in your usual trial-and-error cycles ;) True, CodeBuild doesn't cost much either ($0.005 per minute of build.general1.small), but why not go free while you can? :)

Options, people?

Lambda, on the other hand, has a rather impressive free quota of 1 million executions and 3.2 million seconds of execution time per month. Moreover, traffic between S3 and Lambda is free as far as we are concerned!

Oh, and S3 has a free quota of 20000 reads and 2000 writes per month - which, with some optimizations on the reads, is quite sufficient for what we are about to do.

2 + 2 = ...

So, guess what we are about to do?

Yup, we're going to update our Lambda source artifacts in S3, via Lambda itself, instead of CodeBuild!

Of course, replicating the full CodeBuild functionality via a lambda would need a fair deal of effort, but we can get away with a much simpler subset; read on!

The Big Picture

First, let's see what Sigma does when it builds a project:

  • prepare the infra for the build, such as a role and an S3 bucket, skipping any that already exist
  • create a CodeBuild project (or, if one already exists, update it to match the latest Sigma project spec)
  • invoke the project, which will:
    • download the Sigma project source from your GitHub repo,
    • run an npm install to populate its dependencies,
    • package everything into a zip file, and
    • upload the zip artifact to the S3 bucket created above
  • monitor the project progress, and retrieve the URL of the uploaded S3 file when done.

And usually every build has to be followed by a deployment; to update the lambdas of the project to point to the newly generated source archive; and that means a whole load of additional steps!

  • create a CloudFormation stack (if one does not exist)
  • create a changeset that contains the latest updates to be published
  • execute the changeset, which will, at the least, have to:
    • update each of the lambdas in the project to point to the new source zip file generated by the build, and
    • in some cases, update the triggers associated with the modified lambdas as well
  • monitor the stack progress until it gets through with the update.

All in all, well over 60-90 seconds of your precious time - all to accommodate perhaps just one line (or how about one word, or one letter?) of change!

Can we do better?

At first glance, we see quite a few redundancies and possible improvements:

  • Cloning the whole project source from scratch is overkill, especially when only a few lines/files have changed.
  • Every build will download and populate the NPM dependencies from scratch, consuming bandwidth, CPU cycles and build time.
  • The whole zip file is now being prepared from scratch after each build.
  • Since we're still in dev, running a costly CF update for every single code change doesn't make much sense.

But since CodeBuild invocations are stateless and CloudFormation's resource update logic is mostly out of our hands, we don't have the freedom to meddle with many of the above; other than simple improvements like enabling dependency caching.

Trimming down the fat

However, if we have a lambda, we have full control over how we can simplify the build!

If we think about 80% - or maybe even 90% - of the cases for running a build, we see that they merely involve changes to application logic (code); you don't add new dependencies, move your files around or change your repo URL all the time, but you sure as heck would go through an awful lot of code edits until your code starts behaving as you expect it to!

And what does this mean for our build?

80% - or even 90% - of the time, we can get away by updating just the modified files in the lambda source zip, and updating the lambda functions themselves to point to the updated file!

Behold, here comes QuickDeploy!

And that's exactly what we do, with the QuickBuild/QuickDeploy feature!

Lambda to the rescue!

QuickBuild uses a lambda (deployed in your own account, to eliminate the need for cross-account resource access) to:

  • fetch the latest CodeBuild zip artifact from S3,
  • patch the zip file to accommodate the latest code-level changes, and
  • upload the updated file back to S3, overriding the original zip artifact

Once this is done, we can run a QuickDeploy which simply sends an UpdateFunctionCode Lambda API call to each of the affected lambda functions in your project, so that they can scoop up the latest and greatest of your serverless code!

And the whole thing does not take more than 15 seconds (give or take the network delays): a raw 4x improvement in your serverless dev workflow!

A sneak peek

First of all, we need a lambda that can modify an S3-hosted zip file based on a given set of input files. While it's easy to make with NodeJS, it's even easier with Python, and requires zero external dependencies as well:

Here we go... Pythonic!

import boto3

from zipfile import ZipFile, ZipInfo, ZIP_DEFLATED

s3_client = boto3.client('s3')

def handler(event, context):
  src = event["src"]
  if src.find("s3://") > -1:
    src = src[5:]
  
  bucket, key = src.split("/", 1)
  src_name = "/tmp/" + key[(key.rfind("/") + 1):]
  dst_name = src_name + "_modified"
  
  s3_client.download_file(bucket, key, src_name)
  zin = ZipFile(src_name, 'r')
  
  diff = event["changes"]
  zout = ZipFile(dst_name, 'w', ZIP_DEFLATED)
  
  added = 0
  modified = 0
  
  # files that already exist in the archive
  for info in zin.infolist():
    name = info.filename
    if (name in diff):
      modified += 1
      zout.writestr(info, diff.pop(name))
    else:
      zout.writestr(info, zin.read(info))
  
  # files in the diff, that are not on the archive
  # (i.e. newly added files)
  for name in diff:
    info = ZipInfo(name)
    info.external_attr = 0755 << 16L
    added += 1
    zout.writestr(info, diff[name])
  
  zout.close()
  zin.close()
  
  s3_client.upload_file(dst_name, bucket, key)
  return {
    'added': added,
    'modified': modified
  }

We can directly invoke the lambda using the Invoke API, hence we don't need to define a trigger for the function; just a role with S3 full access permissions would do. (We use full access here because we would be reading from/writing to different buckets at different times.)

CloudFormation, you beauty.

From what I see, the coolest thing about this contraption is that you can stuff it all into a single CloudFormation template (remember the lambda command shell?) that can be deployed (and undeployed) in one go:

AWSTemplateFormatVersion: '2010-09-09'
Resources:
  zipedit:
    Type: AWS::Lambda::Function
    Properties:
      FunctionName: zipedit
      Handler: index.handler
      Runtime: python2.7
      Code:
        ZipFile: >
          import boto3
          
          from zipfile import ZipFile, ZipInfo, ZIP_DEFLATED
          
          s3_client = boto3.client('s3')
          
          def handler(event, context):
            src = event["src"]
            if src.find("s3://") > -1:
              src = src[5:]
            
            bucket, key = src.split("/", 1)
            src_name = "/tmp/" + key[(key.rfind("/") + 1):]
            dst_name = src_name + "_modified"
            
            s3_client.download_file(bucket, key, src_name)
            zin = ZipFile(src_name, 'r')
            
            diff = event["changes"]
            zout = ZipFile(dst_name, 'w', ZIP_DEFLATED)
            
            added = 0
            modified = 0
            
            # files that already exist in the archive
            for info in zin.infolist():
              name = info.filename
              if (name in diff):
                modified += 1
                zout.writestr(info, diff.pop(name))
              else:
                zout.writestr(info, zin.read(info))
            
            # files in the diff, that are not on the archive
            # (i.e. newly added files)
            for name in diff:
              info = ZipInfo(name)
              info.external_attr = 0755 << 16L
              added += 1
              zout.writestr(info, diff[name])
            
            zout.close()
            zin.close()
            
            s3_client.upload_file(dst_name, bucket, key)
            return {
                'added': added,
                'modified': modified
            }
      Timeout: 60
      MemorySize: 256
      Role:
        Fn::GetAtt:
        - role
        - Arn
  role:
    Type: AWS::IAM::Role
    Properties:
      ManagedPolicyArns:
      - arn:aws:iam::aws:policy/service-role/AWSLambdaBasicExecutionRole
      - arn:aws:iam::aws:policy/AmazonS3FullAccess
      AssumeRolePolicyDocument:
        Version: 2012-10-17
        Statement:
        - Action: sts:AssumeRole
          Effect: Allow
          Principal:
            Service: lambda.amazonaws.com

Moment of truth

Once the stack is ready, we can start submitting our QuickBuild requests to the lambda!

// assuming auth stuff is already done
let lambda = new AWS.Lambda({region: "us-east-1"});

// ...

lambda.invoke({
  FunctionName: "zipedit",
  Payload: JSON.stringify({
    src: "s3://bucket/path/to/archive.zip",
    changes: {
      "path/to/file1/inside/archive": "new content of file1",
      "path/to/file2/inside/archive": "new content of file2",
      // ...
    }
  })
}, (err, data) => {
  let result = JSON.parse(data.Payload);
  let totalChanges = result.added + result.modified;
  if (totalChanges === expected_no_of_files_from_changes_list) {
    // all izz well!
  } else {
    // too bad, we missed a spot :(
  }
});

Once QuickBuild has completed updating the artifact, it's simply a matter of calling UpdateFunctionCode on the affected lambdas, with the S3 URL of the artifact:

lambda.updateFunctionCode({
  FunctionName: "original_function_name",
  S3Bucket: "bucket",
  S3Key: "path/to/archive.zip"
})
.promise()
.then(() => { /* done! */ })
.catch(err => { /* something went wrong :( */ });

(In our case the S3 URL remains unchanged (because our lambda simply overwrites the original file), but it still works because the Lambda service makes a copy of the code artifact when updating the target lambda.)

To speed up the QuickDeploy for multiple lambdas, we can even parallelize the UpdateFunctionCode calls:

Promise.all(
  lambdaNames.map(name =>
    lambda.updateFunctionCode({ /* params */ })
    .promise()
    .then(() => { /* done! */ }))

.then(() => { /* all good! */ })
.catch(err => { /* failures; handle them! */ });

And that's how we gained an initial 4x improvement in our lambda deployment cycle, sometimes even faster than the native AWS Lambda console!

Tuesday, February 20, 2018

Serverless: Getting started with SLAppForge Sigma

Yo! C'mere.

Lookn' for somethn'?

Serverless, ya?

Up there. Go strait, 'n take a right at da "Sigma" sign.

(Well, don't blame us yet; at least we thought it was that easy!)

One of our dream goals was that working with Sigma should be a no-brainer, even for a complete stranger to AWS. However, in the (very likely) event that it is not so yet, here is a short guide on how you can get the wheels turning.

Ingredients

First off, you need:

  • an internet connection; since you are reading this, that's probably already ticked off!
  • an AWS account; you could either create your own free account or ping us via Slack for one of our demo accounts
  • a GitHub account; again, free to sign up if you don't have one already!
  • a "modern" browser; we have tested ourselves on Chrome 59+, Firefox 58+, Edge 41+ and Safari 10.1.2+; other versions would probably work as well :)
  • a mouse, trackball or touchpad (you'll drag quite a bit of stuff around) and a keyboard (you'll also type some stuff)

AWS Credentials

Before firing up Sigma, you need to gather or create some access credentials for allowing Sigma to access your AWS account. Sigma will do a lot on your behalf, including building and deploying your app into your AWS account, so for the moment we need full admin access to your account (we are planning on preparing a minimal set of permissions, so you can sleep well at night).

For obtaining admin credentials for your AWS account:

The easy (but not recommended) way:

Here you will allow Sigma to act as your AWS root user for gaining the required access. Although Sigma promises that it will never share your credentials with other parties (and store them, only if you ask to do so, with full encryption), using root user credentials is generally against the AWS IAM best practices.

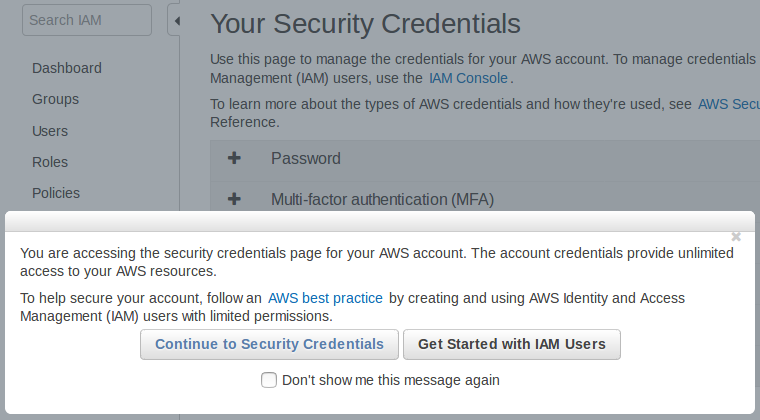
  1. Open the Security Credentials page of the IAM dashboard. If AWS asks for your confirmation, click Continue to Security Credentials to proceed.

    AWS IAM: Security Credentials page

  2. Click Access keys (access key ID and secret access key) among the list of accordions on the right pane.

    Root access keys

  3. Click the Create New Access Key button. A pop-up will appear, stating that your access key has been created successfully.
  4. Click Show Access Key, which will display a pane with two parameters: an Access Key ID that looks like AKIAUPPERCASEGIBBERISH and a longer, Secret Access Key. (WARNING: You'll see the latter value only once!)

    Root keypair created

  5. Copy both of the above values to a secure location (or click Download Key File to save them to your filesystem). Combined, they can do anything against anything in your AWS account: the two keys to rule them all.

The detailed version is here.

The somewhat harder (but safer) way:

Here you will create a new administrator group inside your AWS account, create and assign a new user to that group (so that the user would have admin privileges on your account), and feed that user's access credentials to Sigma. This way, you can instantly revoke Sigma's access anytime by disabling/deleting the access keys of the new user, should you ever come to distrust/hate Sigma at some point in time (but don't do that to us, please! :))

  1. Go to the IAM dashboard.
  2. Select Users on the left pane.
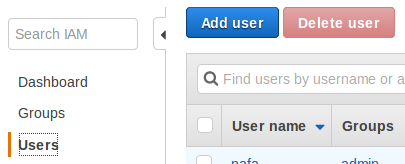
  3. Click the Add user button at the top of the right pane.

    AWS IAM: Add User

  4. Type a name (e.g. sigma) for the User name field.
  5. Under Access type, tick Programmatic access, and click Next: Permissions at the bottom right. (Tip: you can get to this point right away, using this shortcut URL.

    User groups and permissions

  6. Click Create group under the Add user to group option. A new pop-up will open.
  7. Type a name (e.g. admin) for the Group name field.
  8. Tick off AdministratorAccess in the list of policies. (It should usually appear at the top of the list; if not, type Administrator in the Filter text box to see it.)

    Create group

  9. Click Create group.
  10. The pop-up will close, and the brand new group will appear in the groups list of the permissions page, already selected (ticked off) for you.
  11. Click Next: Review.
  12. Double-check that your user has a nice name, and that it belongs to the new group you just created. If all looks fine, click Create user.

    Review new user

  13. Once the user is created, you will be shown a Success page with a table containing the Access Key ID and Secret Access Key (masked with * s) of the user.
  14. Click Show against the secret access key, to view its value. (WARNING: You'll see the latter value only once!)

    Key pair of new user

  15. Copy both Access key ID and Secret access key to a safe location (or click Download CSV above).

Here's the official, detailed version.

Once you follow either of the above methods (and have an access key-secret key pair in hand), that's it! You'd no longer need to wander around on the AWS dashboards, as Sigma will handle it all for you.

Signing up with Sigma

Now, you're just three steps away from the awesome Sigma IDE! Let's go one step further by creating a brand new Sigma account (if you don't already have one):

  1. Go to the Sigma sign-in page.
  2. Click the "Create an account" link against the "New to Sigma?" message.
  3. Fill in your first and last names, email, and phone number (if it's okay with you).
  4. Take note of your username: we'll automatically generate one, using your first and last names. If you don't like our taste, you can always type in your own crazy one (as long as another user has not used it already).
  5. Choose a password. We are a bit peculiar about our passwords, so they need to be at least 8 letters long and have at least one from each of the letter categories: uppercase, lowercase, numeric and symbolic (@, $, # etc.). You can press and hold the "show password" button (eye icon) to confirm what you have typed.
  6. When all looks good, click Sign Up.
  7. If we are happy with the info you provided, we'll take you to a confirmation page (Insert Confirmation Code). We'll also send an email to the address you indicated (from noreply@slappforge.com), with a verification code.
  8. Check your mailbox for our email (including promotions, spam, trash etc. in case it does not show up in the inbox). Once you find it, copy the 6-digit confirmation code in the email, paste it into the confirmation page, and click Confirm.
  9. If all goes well, we'll show you a "Confirmation successful!" message, with a link back to the sign-in page.
  10. Go to the sign-in page, and log in using your username (that you took note previously, on the signup page) and password.

Powering up Sigma

Way to go! Just two more steps!

  1. After sign-in, you'll be in an AWS Credentials page.
  2. Now, dig up the "access key ID" and "secret access key" that you retrieved from the AWS console previously, and paste them in the Access Key ID and Secret Key fields, respectively.
  3. Now, you have a decision to make:
    1. Sigma can store these AWS keys on your behalf, so that you will not have to re-enter them at every log-in. We will encrypt the keys with your own password (your password will be in Cognito, AWS's own user management service, so we will never see your password either!), hence rest assured that we, or any other party, will not—and will not be able to—steal your keys :)
    2. If you are a bit too skeptical, you can avoid the storing option by unticking the Save Credentials tick box.
  4. When done, Click Load Editor.

Connecting GitHub

Yay! Last step!

  1. Now you will be in the projects page, with a quickstart pane (saying Integrate Sigma with GitHub!) on the left.

    Sigma Projects page with GitHub integration message

  2. Click the Sign in with GitHub button. A GitHub authorization window will pop up (if it does not, tune your browser to enable pop-ups for sigma.slappforge.com and try again).
  3. On the pop-up, sign in to GitHub if you are not already signed in.
  4. The pop-up asks you to authorize the Sigma GitHub app (made by us, slappforge) to connect with yOnour GitHub account. Click the Authorize slappforge button to continue.
  5. Once done, the pop-up will close, and the quickstart pane will start displaying a bunch of ready-made Sigma projects!
    1. Your Projects tab will display any Sigma-compatible projects that are already in your GitHub account.
    2. Samples tab will display the numerous samples published by SLAppForge, that you can try out right away.

      Sigma sample projects

    3. If you have the GitHub URL of any other Sigma project that you know of, just paste it in the search bar of the Public Repositories tab and hit the search button.
  6. Once you have the project that you were looking for, simply click to load it!

Voilà!

Here comes the Sigma editor, loaded with the project you picked, and ready for action!

Friday, February 16, 2018

Sigma: The New Kid on the Serverless Block

Despite its young age (barely 73 years; in comparison to, say, automobiles (200+), digital computing is growing and flourishing rapidly; and so are the associated tools and utilities. Today's "hot" topic or tech is no longer hot tomorrow, "legacy" in a week and "deprecated" in a month.

Application deployment and orchestration is no exception: in just three decades we have gone from legacy monoliths to modular systems, P2P integration, middleware, SOA, microservices, and the latest, functions or FaaS. The deployment paradigm has shifted to comply, with in-house servers and data centers, enterprise networks, VMs, containers, and now, "serverless".

Keeping up with things was easy so far, but the serverless paradigm demands quite a shift in the developer mindset (not to mention the programming paradigm). This, combined with the lack of intuitive tooling, has fairly hindered the adoption of serverless application development, even among the cutting-edge developers.

And (you guessed it), that's where _____ comes into play.

Missing something?

Yup.

A way to glue stuff together.

A way to compose a serverless application care-free. Without having to worry—and to read tons of documentation, watch reels of tutorials, or trial-and-error till your head is on fire—about all the bells and whistles of the underlying framework and related services.

Essentially, a sum-up of all that is serverless.

Sum.

Sigma.

Σ.

Sigma Logo

What's in a name?

As the name implies, (quoted from the official website)

The Sigma editor is a hybrid between the simplicity of drag-and-drop style development,
and the full and unlimited power of raw code.

The drag-and-drop events generate sample or usage snippets to quickly get started,
and introduce a powerful, uniform and intuitive library with auto-completion,
which allow users to quickly become productive in developing Serverless applications
that integrate with a myriad of AWS based services.

Making of...

Before Sigma, a bit of background of its origins.

As a first-time user of AWS Lambda, one of our team members brought up an impressive series of questions: if serverless is so cool, why is it so complicated to get an application up and running in Lambda?

(His quest, converted into a presentation, is [right here].)

And we ourselves started trying out the same thing. Guess what, we got the same questions as well.

So we set out to devise something that could bypass all those tedious steps: something where we could just write our code, save it, and deploy it as a working serverless application, without having to wander from dashboard to dashboard, or sift through heaps of documentation or reels of video tutorials.

And we ended up with Sigma!

Yet another IDE?

At first glance, Sigma looks like another cloud IDE that additionally supports deploying an application directly into a serverless provider environment (AWS so far).

However, there are a few not-to-be-missed distinctions:

  • Unlike many of the existing cloud IDEs, Sigma itself is truly serverless; it runs completely inside your browser, using backend services only for user authentication and analytics, and requires no dedicated server/VM/container to be running in the background. Just fire up your browser, log in, and start coding your dream away.
  • Sigma directly interacts with and configures the serverless platform on your behalf, using the credentials that you provide, saving hours of configuration and troubleshooting time. No more back-and-forth between overcomplicated dashboards and dizzying configurations.
  • Sigma encapsulates the complexities of the serverless platform, such as service entities, access policies, invocation trigger configurations and associated permissions, and even some API invocation syntaxes, saving you the trouble of having to delve into piles of documentation.
  • All of this comes in a fairly simple, intuitive environment, with easy, drag-and-drop composition combined with the full power of written code. Drag and drop a DynamoDB table into the UI, pick your operation and just write your logic, and Sigma will do the magic of automatically creating, configuring and managing the DynamoDB table on your AWS account.

Now, I won't say that's "just another IDE"; what say you?

A serverless platform?

Based on the extent of its capabilities, you may also be inclined to classify Sigma as a serverless platform. This is true to a great extent; after all, Sigma facilitates all of it—composing, building and deploying the application! However...

Hybrid! It's a hybrid!

Yup, Sigma is a hybrid.

Fusion of a cloud IDE (which in itself is a hybrid of graphical composition and granular coding) and a serverless development framework (which automatically deploys and manages the resources, permissions, wiring and other bells and whistles of your serverless application).

One of a kind.

To be precise, the first of its kind.

A new beginning

With Sigma, we hope to redefine serverless development.

Yup. Seriously.

From here onwards, developers shall simply focus on what they need to achieve: workflow, business logic, algorithm, whatever.

Not about all the gears and crankshafts of the platform on which they would deploy the whole thing.

Not about the syntax of, or permissions required by, platform-specific API or service calls.

Not about the deployment, configurations and lifecycle of all the tables, buckets, streams, schedulers, REST endpoints, queues and so forth, that they want to use within their application.

Because Sigma will take care of it all.

And we believe our initiative would

  • make it easy for newcomers to get started with serverless development,
  • improve the productivity of devs that are already familiar with—or even experts of—serverless development,
  • speed up the adoption of serverless development among the not-yet-serverless community,
  • allow y'all to "think serverless", and
  • make serverless way much fun!

We have proof!

While developing Sigma, we also wanted to verify that we were doing the right thing, and doing it right. So we bestowed upon two of our fellows, the responsibility to develop two showcase applications using Sigma: a serverless accounting webapp, and a location-based mobile dating app.

To our great joy, both experiments were successful!

The accounting app SLAppBook is now live for public access. By default it runs against one of our test serverless backends, but you can always deploy the serverless backend project on your own AWS account via Sigma and point the frontend to your brand new backend, after which you can use it for your own personal use!

The dating app HotSpaces is currently undergoing some rad improvements (see, now it's the frontend that takes time to develop!) and will be out pretty soon!

So, once again, we have proof that Sigma really rocks it!

Far from perfection, but getting there; fast!

Needless to say, Sigma is pretty much an infant. It needs quite a lot more—more built-in services, better code suggestions, smarter resource handling, faster builds and deployments, support for other cloud platforms, you name it—before it can be considered "mature".

But we are getting there. And we will get there. Fast.

We will publish our roadmap pretty soon, which would include (among other things) adding more AWS services, supporting integration with external APIs/services and, most importantly, expanding to other cloud providers like GCP and MS Azure.

That's where we need your help.

We need you!

Needless to say, you are most welcome to try out Sigma. Sign up here, if you haven't already, and start playing around with our samples (once you are signed in to Sigma, you can directly open them via the projects page). Or, if you feel adventurous, start off with a clean slate, and start building your own serverless application.

We are continually smoothening the ride, but you may hit a few bumps here and there. Possibly even hard ones. Sometimes even impassable. Maybe none, if you are really lucky.

Either way, we are eagerly waiting for your feedback. Just write us about anything that came to your mind: a missing functionality, a popular AWS service that you really missed in Sigma (there are hundreds, no doubt!), the next cloud platform you would like Sigma to support; a failed build, a faulty deployment, a nasty error that hogged your browser; or even the slightest of improvements that you would like to see, like a misaligned button, a hard-to-scroll pop-up or a badly-named text label.

You can either use our official feedback form or the "Report an Issue" option on the IDE Help menu, post your feedback in our GitHub issue tracker, or send us a direct email at info@slappforge.com.

If you would like to join hands with us in our forward march, towards a "think serverless" future, drop us an email at info@slappforge.com right away.

Welcome to Sigma!

That's it; time to start your journey with Sigma!

(Originally authored on Medium.)